Introduction
Mighty E-commerce is a modern, all-in-one E-commerce Management and System built with Flutter and Laravel. It is designed for educators, coaching centers, and organizations to create, manage, and conduct exams efficiently.
The system allows you to build a structured question bank with categories, subjects, chapters, and difficulty levels. You can generate quizzes for practice, mock tests, or real exams with full control over timing, scoring, and evaluation.
Mighty E-commerce supports online examinations, instant result generation, performance analysis, and detailed reports — making it a complete solution for exam preparation and assessment management on a single powerful platform.
Installation on Live Server
Step 1 — Download Script From Envato
Login to your Envato (CodeCanyon) account. Navigate to Downloads → Click Download → All Files & Documentation. Extract the downloaded ZIP file on your computer.
Step 2 — Login To Hosting Control Panel
Login to your hosting control panel (cPanel or DirectAdmin). This panel will be used to manage domains, files, and databases.

Step 3 — Server Requirements Check
Make sure your server meets the following minimum requirements:
- PHP Version: 8.2 or higher
- MySQL Version: 5.7+ or MariaDB
- Required PHP Extensions:
- Fileinfo
- GD
- JSON
- OpenSSL
- PDO
- XML
- Mbstring
- CURL
Step 4 — Create Subdomain For API
Go to Domains section and create a subdomain for API usage.
api.yoursite.com
Using a separate API subdomain improves security and performance.

Step 5 — Select Subdomain Directory
Select the installation directory for API files. Recommended folder:
public_html/api

Step 6 — Open API Folder
Open the API folder from File Manager. This is where system files will be uploaded.

Step 7 — Upload System Files
Upload the following file into the API folder:
mighty-quiz-api-code.zip
After upload completes, extract the ZIP file.

Step 8 — Create Database
Open MySQL Database Wizard from cPanel.

Step 9 — Create Database Name
Enter database name and click Next.
mighty_quiz_db

Step 10 — Create Database User
Create database username and password. Save these credentials safely.

Step 11 — Assign Database Privileges
Select ALL PRIVILEGES and continue.

Step 12 — Open Installation Wizard
Open your browser and visit:
https://api.yoursite.com/install

Step 13 — Set Folder Permissions
Set following folders permission to 775:
- storage
- bootstrap/cache
These permissions are required for Laravel caching, logs, sessions and uploads.

Step 14 — Server Requirement Verification
Installer will automatically verify:
- PHP Version
- Required PHP Extensions
- Writable Folder Permissions

Step 15 — Purchase Code Verification
Enter your Envato purchase code and username to activate your license.

Step 16 — Database Configuration
Enter your database credentials:
- Database Name
- Database Username
- Database Password
- Database Host (usually localhost)

Step 17 — Test Database Connection
Click Test Connection. If successful, continue to next step.

Step 18 — Installation Processing
System will now:
- Create database tables
- Insert demo data
- Generate application key
- Optimize configuration

Step 19 — Installation Completed Successfully
Installation completed successfully. You can now login to the admin panel and start using the system.

Step 20 — Test API Using Postman
Import the provided Postman collection and verify that all API endpoints are working correctly.

⚠️ Important Post-Installation Notes
-
Storage & File Permission Setup:
If you face file upload or access issues, set proper permissions for thestorageandbootstrap/cachedirectories.
Recommended:chmod -R 775 storage bootstrap/cache
(or660 / 600depending on your server configuration) -
Laravel Passport Key Permissions:
Ensure proper permissions are set for Passport OAuth keys:storage/oauth-private.keyandstorage/oauth-public.key
Recommended:chmod 600 storage/oauth-private.key
chmod 644 storage/oauth-public.key
If keys are missing, generate them using:php artisan passport:install -
Storage Link:
Make sure the storage link is created correctly:php artisan storage:link
Also verify that files are accessible from thepublic/storagedirectory. -
First Domain Setup (Important):
After installation, manually update your primary domain in the database.
Go to theshopstable and set your current domain in thedomaincolumn.
This step is required only for the first-time setup.
Installation on Local Server (XAMPP / Laragon / WAMP)
Follow the steps below for localhost installation:
- Install XAMPP, Laragon or WAMP
- Start Apache and MySQL services
- Ensure PHP version is 8.2+
Create database using phpMyAdmin:
http://localhost/phpmyadmin
Extract project files into:
htdocs/mighty-quiz
Open installer:
http://localhost/mighty-quiz/public/install
Follow the same installation steps as Live Server.
📱 App Setup
Mighty allows you to quickly set up and launch your own quiz and online exam application with minimal configuration.
You can easily customize app branding, connect with the backend API, and configure essential settings for managing question banks, quizzes, and exams.
The setup process ensures a smooth deployment experience, enabling you to start creating and conducting exams for students or users in no time.
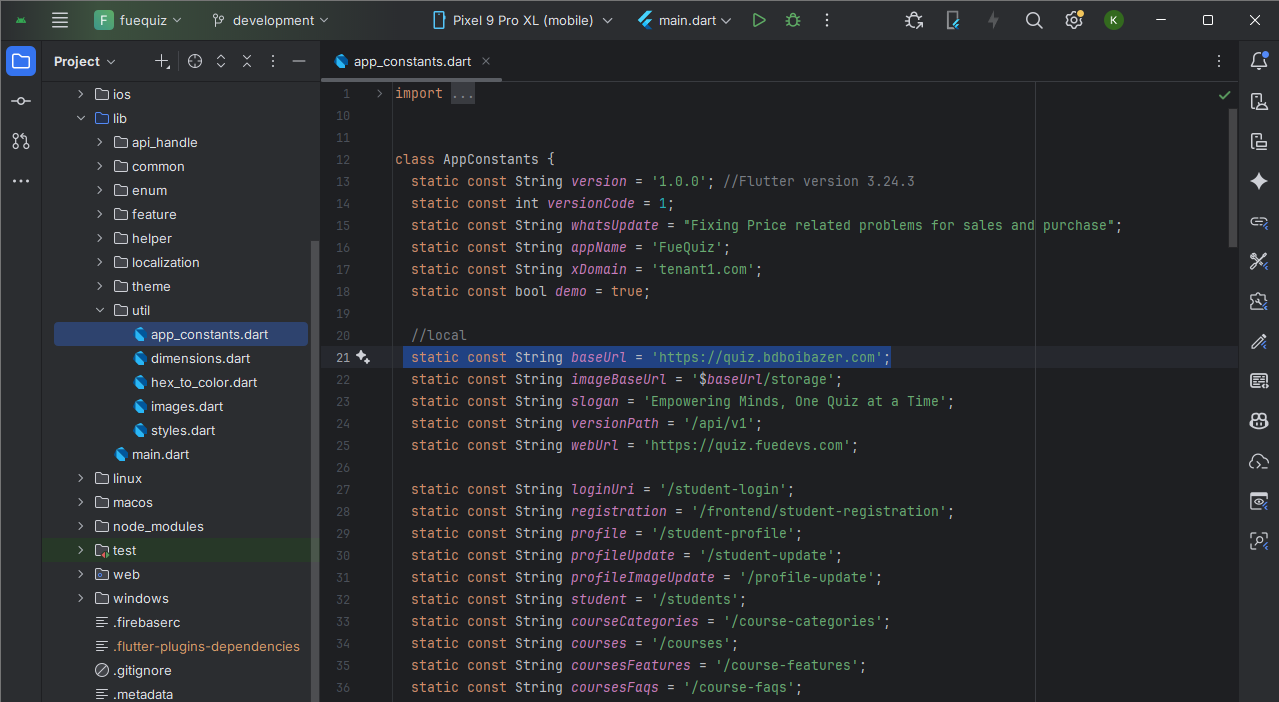
🌐 Set Base URL
Open the following file:
/lib/utils/app_constant.dart
Update the base URL:
static const String baseUrl = "https://api.domain.com";
The Base URL must be your API server domain, not your website or admin panel domain.
Example:
✅ Correct: https://api.yourdomain.com
❌ Incorrect: https://yourdomain.com
Rebuild the app after updating.
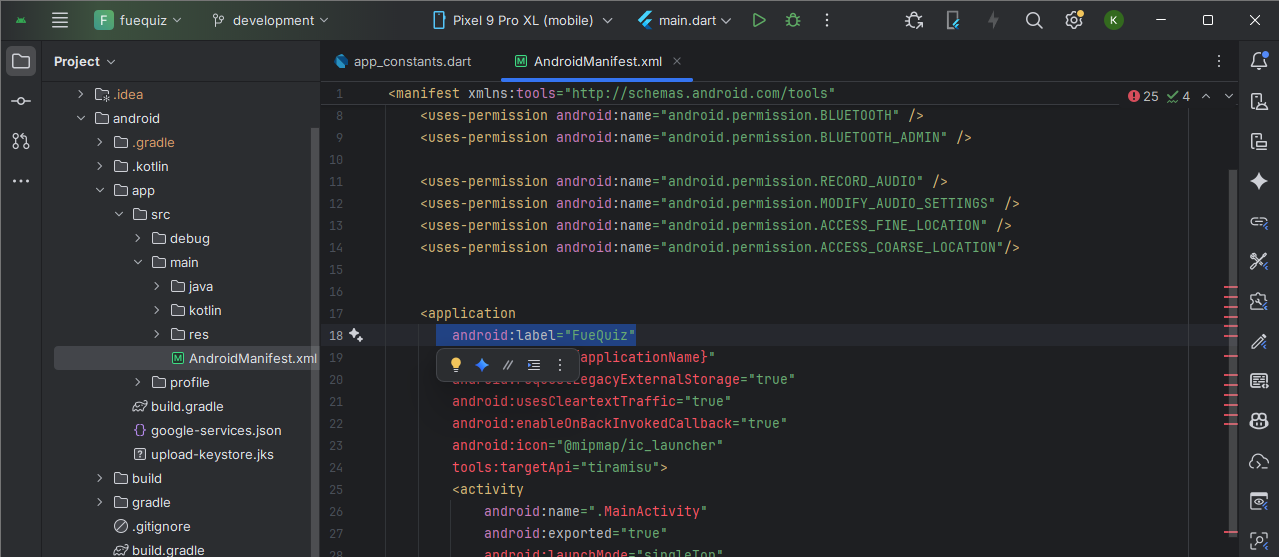
Change App Name
- Edit
appNamein/lib/utils/app_constant.dart - Update label in
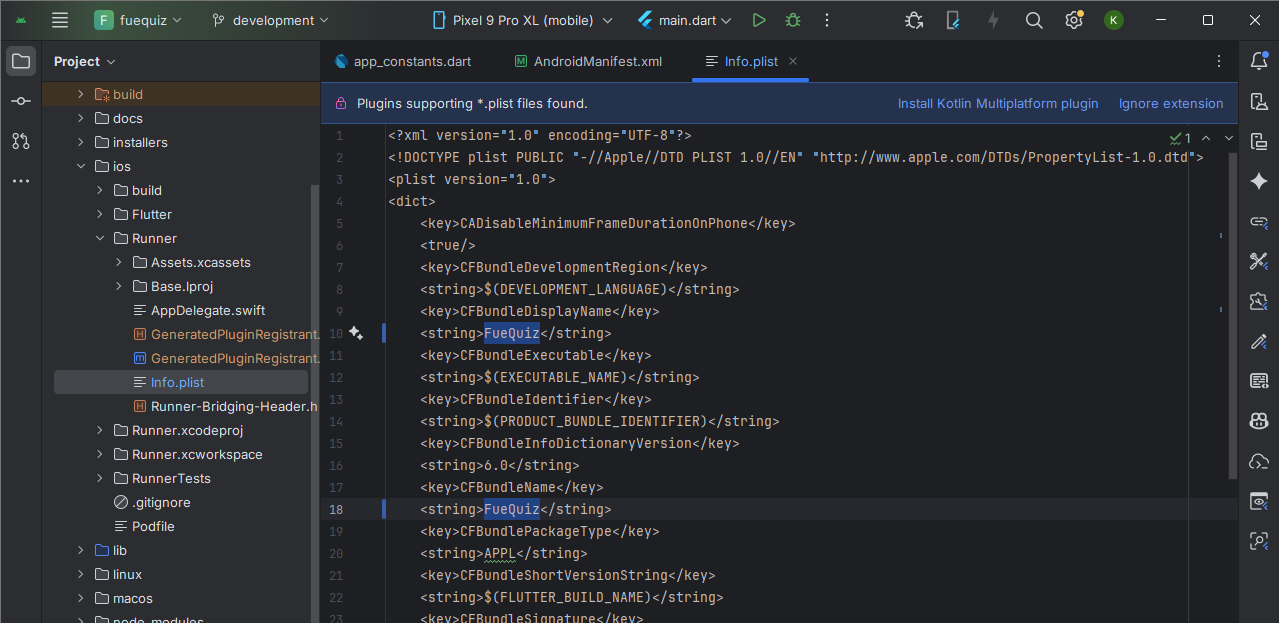
AndroidManifest.xml - Update app name in
Info.plist

Change App Package Name
The Android package name should be updated before publishing the application. To begin, open the following file:
android/app/build.gradle
Inside the android section, locate the namespace entry:
android {
    namespace = "com.fuedevs.quiz"
}
Select the current namespace value and use the IDE’s global search and replace feature to update it throughout the project.
- Windows / Linux:
Ctrl + Shift + R - macOS:
Command + Shift + R
This ensures that the old package name is replaced consistently in all necessary files and directories.

Files to Review
android/app/build.gradleandroid/app/src/main/AndroidManifest.xmlandroid/app/src/debug/AndroidManifest.xmlandroid/app/src/profile/AndroidManifest.xmlandroid/app/src/main/java/orandroid/app/src/main/kotlin/
After completing the replacement, clean and rebuild the project using:
flutter clean
flutter pub get
flutter run
⚠ Warning: Any incorrect or incomplete package name replacement may result in build errors or integration issues.
Change App Icon
You can personalize the app to reflect your own brand by updating the logo, app icon, splash screens, colors, fonts, and other visual elements. This ensures a consistent and professional look across the entire application.
2. Change App Icon
To replace the app icon, you need to generate all required icon sizes for Android and iOS. A recommended tool for this is: https://www.appicon.co/
- Upload your base icon to the generator and download the generated package.
- Android: Go to
/android/app/src/main/resand replace allmipmap-*folders with the corresponding folders from the generated Android icon package. - iOS: Go to
/ios/Runner/Assets.xcassetsand replaceAssets.xcassetswith the generated iOSAssets.xcassetsfolder.
Important: Keep the folder structure and file names exactly as in the generated package. Incorrect replacement may cause icons not to appear in the app.
3. Apply Changes
After updating the logo and icon, run the following commands to apply changes properly:
flutter clean
flutter pub get
flutter run
By following these steps, you can fully customize your app branding with minimal effort.
Build for Android
Once the application setup is complete, you can generate Android build files for testing or production release using Flutter CLI commands.
Generate APK
Run the following command to generate a full release APK:
flutter build apk
This command creates a release APK that supports all major Android device architectures.
Output location:
build/app/outputs/flutter-apk
Generate Split APKs (Smaller Size)
To generate separate APK files for different CPU architectures (recommended for smaller file size), run:
flutter build apk --target-platform android-arm,android-arm64,android-x64 --split-per-abi
This command generates multiple APK files. Use the APK that matches the target device architecture.
Generate App Bundle (Google Play Store)
The Android App Bundle (.aab) is the recommended format for publishing apps on the Google Play
Store.
Step 1 — Configure Signing
Open the following file:
android/app/build.gradle
Inside buildTypes > release, set:
signingConfig = signingConfigs.release
Step 2 — Generate New Keystore (JKS)
Run the following command in your terminal.
macOS / Linux:
keytool -genkey -v -keystore ~/upload-keystore.jks -keyalg RSA \
-keysize 2048 -validity 10000 -alias upload
Windows (PowerShell):
keytool -genkey -v -keystore $env:USERPROFILE\upload-keystore.jks `
-storetype JKS -keyalg RSA -keysize 2048 -validity 10000 `
-alias upload
Step 3 — Create key.properties File
Create a file named:
/android/key.properties
Add the following content:
storePassword=12345678 //your password
keyPassword=12345678 // your password
keyAlias=upload // your alias
storeFile=./upload-keystore.jks //your jks file path
The keystore file location may be:
- macOS: /Users/<username>/upload-keystore.jks
- Windows: C:\\Users\\<username>\\upload-keystore.jks
Step 4 — Build App Bundle
Run the following command:
flutter build appbundleand the output file path is
build/app/outputs/bundle/release/app-release.aab
This command generates the Android App Bundle (.aab), which is required for publishing apps on the Google Play Store.
Build for iOS
iOS applications cannot be installed directly on physical devices in the same way as Android APK files. Apple requires iOS apps to be distributed through official channels such as TestFlight for testing or the App Store for public release.
To install and test the app on an iPhone or iPad, you must configure your Apple Developer Account, set up code signing in Xcode, and upload the build to TestFlight or the App Store.
Certificate Signing Request (CSR) Creation and Installation Guide
Step 1: Create a Certificate Signing Request (CSR)
- Open Keychain Access on your Mac.
- Go to Keychain Access → Certificate Assistant → Request a Certificate from a Certificate Authority.
- Enter your email address, CA email address, and a common name (you may use your app name).
- Select "Save to Disk".
- Click Continue and save the CSR file to your computer.


Step 2: Generate the .p12 Certificate
- Go to your Apple Developer Account.
- Navigate to Certificates, Identifiers & Profiles.
- Click on Certificates and then click the (+) button.
- Select "Apple Push Notification service SSL (Sandbox & Production)".
- Select the appropriate App ID.
- Click Continue and upload the CSR file you created.
- Download the generated certificate.


Step 3: Install the Certificate
- Double-click the downloaded certificate file to install it in Keychain Access.
- Go to Keychain Access → My Certificates.
- Locate the newly installed certificate.
- Right-click the certificate and select Export.
- Choose a location and export the certificate as a .p12 file.
- Set a password for the certificate.
Note: Store the password securely. Xcode may ask for the Keychain password when running the app. If you prefer not to enter the password each time, you may leave it empty.
Open the Project in Xcode
- Open Xcode on your Mac.
- Select File → Open or press Command + O.
- Navigate to your Flutter project directory.
- Open the ios folder.
- Select the .xcworkspace (recommended) or .xcodeproj file.
Xcode will open your Flutter project, allowing you to build, run, and configure your iOS application.
Change Bundle Name
- Select your project in the Xcode project navigator.
- Choose the target from the Targets section.
- Go to the Info tab.
- Scroll to Custom iOS Target Properties.
- Locate Bundle Name and edit its value.
- Save changes using Command + S.

Change Bundle Identifier
The Bundle Identifier is a unique identifier for your application on iOS and macOS. It must be unique across all apps in the App Store.
- Select your project in Xcode.
- Go to the General tab.
- Under the Identity section, update the Bundle Identifier.

Web Setup
Change Branding
- Logo:
/web/logo.png - Header Logo:
/web/appbarlogo.png - Favicon:
/web/favicon.png - Title & Description:
/web/index.html - PWA Name:
/web/manifest.json
Build Web
flutter build web
Upload files from /build/web/ to your domain (including hidden files).
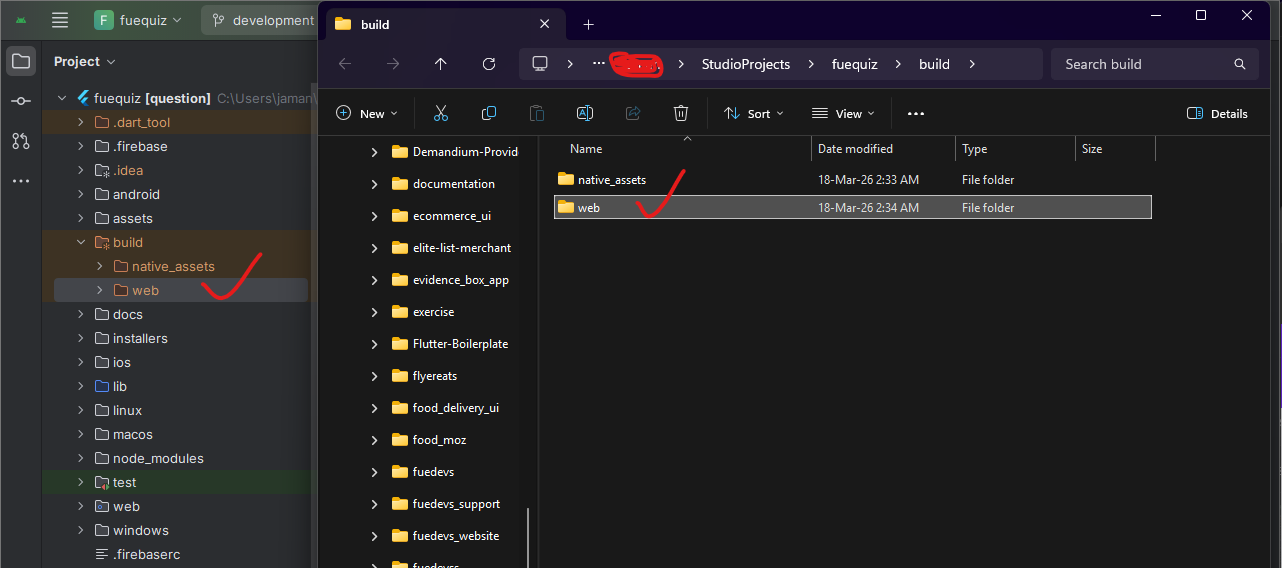
After successfully build. open /build/web folder. You will see web folder. Zip it and upload to your server.
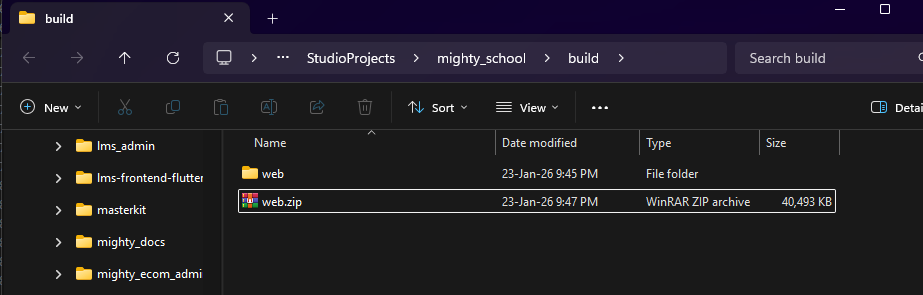
Yor are Done! Your web is live now.
Changelog
This changelog documents the version history of Mighty, including new features, improvements, and bug fixes.
- Version 1.0.0 – Initial release with core features, including quiz creation, question bank management, exams, and result analysis.
Note: Remember to update this changelog for every new version of the app to keep users informed about updates and changes.